Video Encoders are software external to CAM4 (such as SplitCam, OBS and ManyCam) that you can install on your PC and use to broadcast live on CAM4.
Here are some of the benefits you have when transmitting with an encoder:
– higher video quality and connection stability
– add text, images and videos to your broadcast
– add animations to connected tipping games and sex toys (eg Lovense)
Splitcam is one of the simplest encoders to use and offers an intuitive interface and quick setup . It also allows a greater integration with Lovense sex toys.
1. Installation and configuration of SPLITCAM
- Download Splitcam (Windows/ MacOs)
from the official website Splitcam.com or click here.

- At the end of the installation Splitcam will open the broadcasting interface.
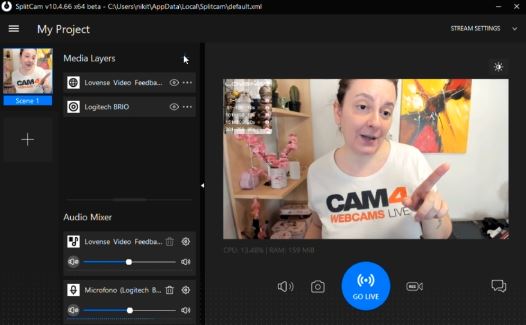
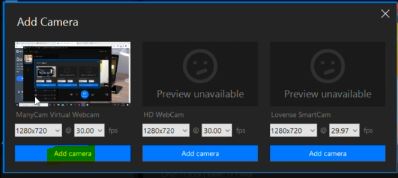
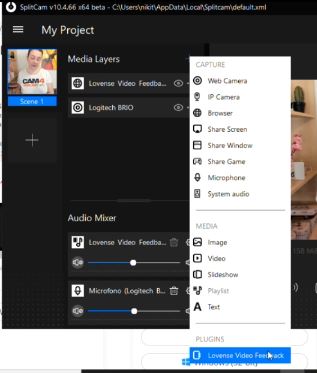
- Input Video (Webcam):
if you DO NOT see your video stream (black screen) you simply need to add your video source (your webcam) by clicking on + < / strong> next to MEDIA LAYERS , click on Webcam at the top, then give access to the webcam you want to use.
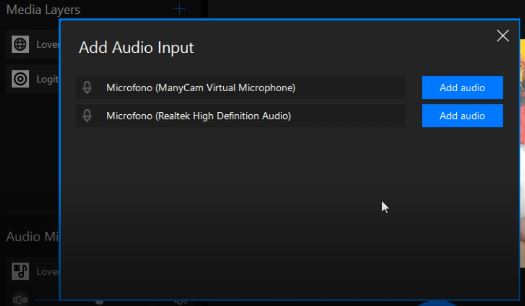
- Audio Input (Microphone):
To manage the microphone audio, click on the + next to AUDIO MIXER at the bottom, then select the microphone you want to use (Add Audio ).
- CAM4 Stream Channel and Key Input:
Before broadcasting on CAM4 you will need to set the streaming channel to allow Splitcam to broadcast on CAM4 through your streaming key .
At the top right click on Stream Setting , then Add Channel and select the channel CAM4 .
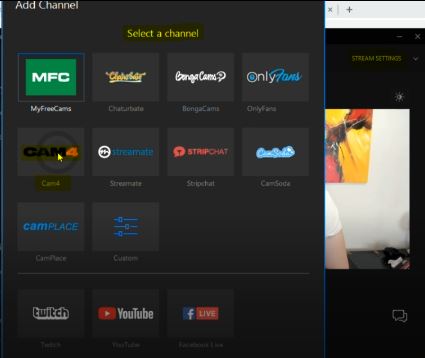
- In the channel settings, you will be able to customize the name and you will have to enter your personal CAM4 STREAMING KEY .
You can find your streaming key when opening the broadcast window. Go to CAM4.com and log in, then click on Broadcast and select the tab at the top EXTERNAL ENCODER.
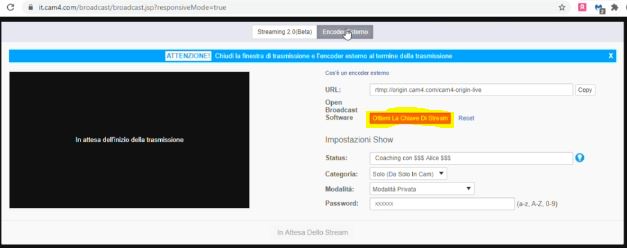
- Click on Get Streaming Key and then copy your streaming key (note your streaming key is personal and private, do not give it to anyone ).
Now you just have to paste it on SplitCam in the STREAM KEY field.

- We recommend that you use the default settings ( Recommended Preset ) and click on Save and Close.
If later, during your broadcast on CAM4 you have problems you can change and customize them (Select Preset).
2. Broadcasting with Splitcam on CAM4
Once the Splitcam software is installed and configured you will be ready to broadcast your stream on CAM4 via your streaming key.
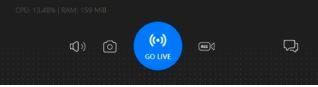
- To send your audio / video stream at the end of the CAM4 broadcast, click on Splitcam’s GO LIVE button.
- Go back to the CAM4 broadcast window and verify that your video and audio stream are working and that the image quality is excellent and or good. Note: It is possible that the delay in the broadcast is a few seconds , but this shouldn’t affect your show.
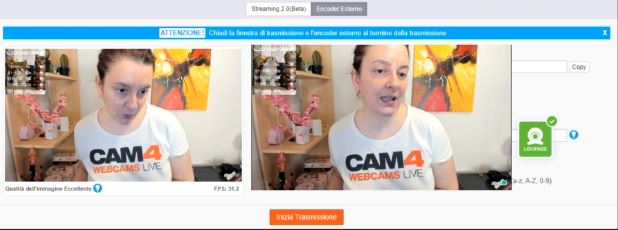
- To go live on CAM4, finally, click on Start Broadcast.
3. Connect Lovense to SplitCam
You can connect your Lovense toy (eg Lush, Hush etc ..) to SplitCam to add animations and responsive images when tipped.
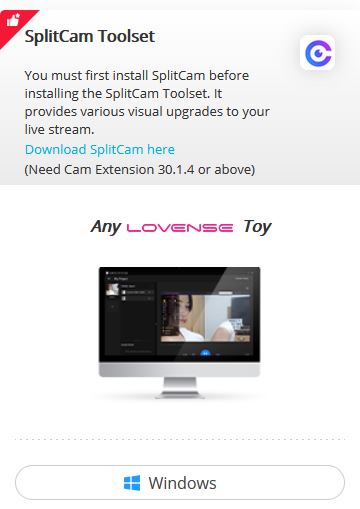
- Download the Lovense ToolKit package on the official website of Lovense .
(note, currently only available for Windows)
- Once the Toolset has been downloaded, open Splitcam encoder and click on + next to Media Layer . The Lovense Video Feedback plug-in will appear in the menu. Select it to enable it in your Media Layers.
- During the broadcast on CAM4 you should see the Lovense plug-in icon (remember that you will need to enable the Lovense extension in your Browser, read below how to download the extension *).
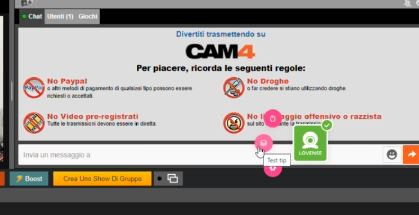
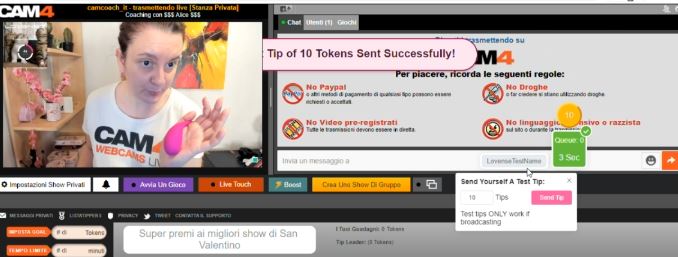
- Test to verify that the plug-in is enabled and that your Lovense toy responds correctly to the tips received.
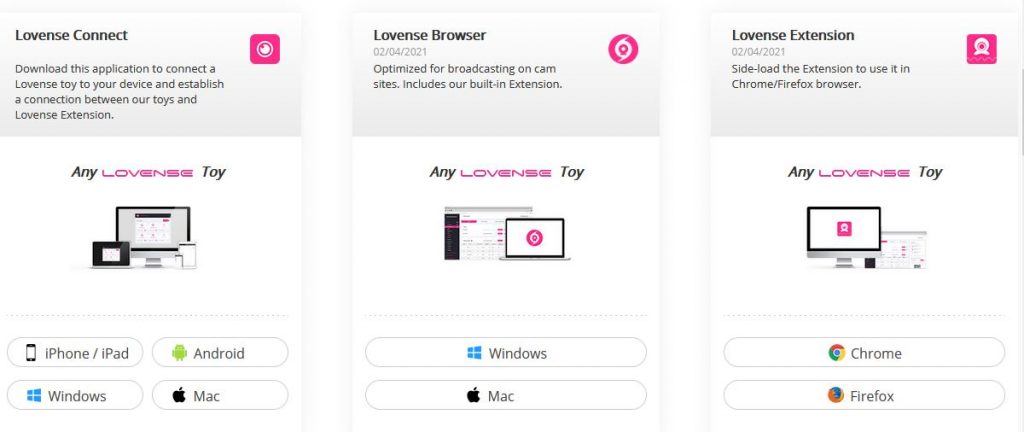
* If you don’t have the Lovense extension (version 30.1.4 or higher) , you can download it on the official website of Lovense . You can also download the official Browser and other Lovense packages compatible with various encoders.
LINKS:
Download Lovense ToolKit: lovense.com/cam-model/download
Download Splitcam: splitcam.com/download