

All the basics to start your broadcast: from launching the broadcast window, to how to put all the settings in place!
Step 1: Launch the Broadcast Window
Start your show by hitting 'Broadcast' on the CAM4 header bar (at the top of your screen) in your Dashboard or any other page on CAM4.
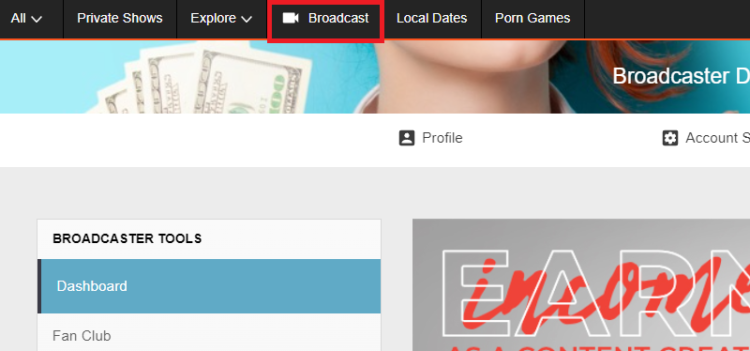
Please note: only ID verified broadcasters can live stream. If you are not ID verified yet you will be asked to go through this process first.
Step 2: Select Broadcast Type
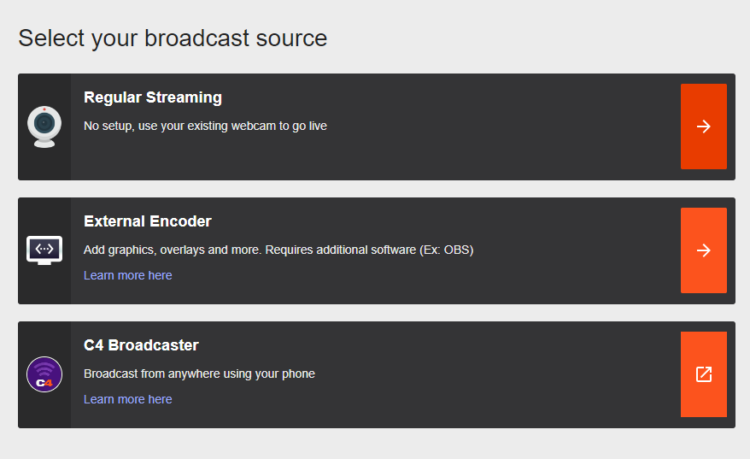
Regular Broadcast - This is the default broadcast type for CAM4.
External Encoder - If you have experience with external encoding software, you can use this tab to connect your external stream to CAM4.
Learn more about External Encoding here.
Let's have a look at what it will look like when you start Regular Streaming:
Step 3: Video / Audio Settings
It is important that you give permissions for CAM4 to use your video and your microphone. Once you give these permissions, CAM4 will detect your video and audio devices:
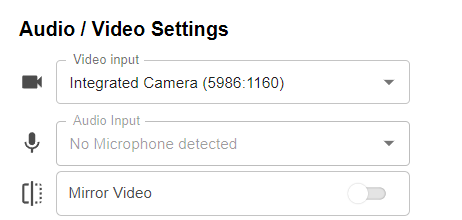
You don't have to worry about the aspect ratio of your video. This will be chosen automatically, based on the ideal proportions for your hardware.
Usually you don't have to tinker with these settings and CAM4 will detect the right devices automatically. But here you can select your preferred video and audio input if you wish, or choose to use an external encoder like OBS.
You can flip your image horizontally by toggling Mirror video.
Step 4: Show Details
Underneath your audio and video settings, you will find your show details:
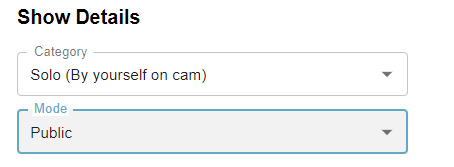
Category
Here you can select whether you will broadcast by yourself (Solo) or with another, verified user. Depending on your gender, you'll be shown the options (Male-Female, Male-Male, or Female-Female).
Select the appropriate category.
Mode
By default this is set to public. If you are an approved CAM4 broadcaster (2257/ID approved) then you can choose to have a password protected room.
Step 5: Set your tags
Tags are a great way to communicate to potential viewers what to expect from your show.
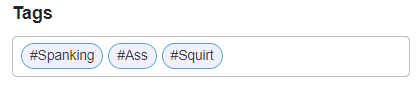
Choose tags that are appropriate to what your show is all about. This will make sure viewers will get to see what they want, and you get viewers that want to see what you want to show!
We recommend picking about 3 tags.
Step 6: Check your stream quality
Below the area where your video is shown, you'll see information about your stream quality and FPS:

It's useful to give these a quick glance before you start your broadcast, just to make sure that your video quality is to your viewers satisfaction.
Stream Quality
Indicates any stream issues so you can fix them before you start your broadcast. The light bulb shows troubleshooting suggestions.
FPS - Your cameras frames per second (FPS). 25-30 FPS is ideal.
When you see a low Stream quality and/or FPS, it may be worthwhile to do a speedtest and/or a reset of your router.
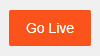
Step 7: Go Live!
Once your settings are correct you can go live and start your show!
~That’s all for this lesson!
Happy Camming!
Love, Your Coaching Team!


